Tutorial: Inspecting the Inspector in Final Cut Pro X, Pt. 1
This tutorial on Apple Final Cut Pro X inspects the Video Inspector, 冷冻铸造X界面的上下文敏感区域,允许您更改各种过滤器和设置的设置, and focuses on making basic but effective color adjustments.
By
格伦·艾略特
Posted on October 7, 2013
在这篇Apple Final Cut Pro X教程中,我们将检查检查器, Final Cut Pro X的上下文敏感区域,允许您更改各种过滤器和设置的设置.
To tell 冷冻铸造X to show the Inspector, click on the icon second from the right in the panel just above the timeline. 它看起来像一堆带有旋钮的滑块,当你点击它时,它会切换开关(下面的图1). 您还可以使用键盘快捷键Command+4显示或隐藏检查器.

图1. Click this icon to toggle the Inspector on or off. (点击这张图片——或者本文中的任何截图——可以在新窗口中看到完整尺寸的版本.)
Working in the Color Area
To inspect the Inspector (下面的图2), we’ll start from the top and work our way down. 在本教程中 we’re going to focus on the Color area. This is the area of the Inspector you’ll use the most.

图2. The Effects and Color sections of the Final Cut Pro X Inspector.
在颜色区域的正上方,你可以看到另一个区域:效果区域. That one will populate with effects as you add them from the Effects palette. 所以如果你抓取一个效果并把它拖到剪辑上,它就会填充这个效果区域. 但是正如我之前提到的,在本教程中我们将主要关注颜色区域.
在我们开始之前, 了解时间轴光标在选择中的行为及其工作原理非常重要. If nothing is selected on my timeline, 无论时间轴光标在哪个剪辑上,都会自动加载到检查器中. Let’s say I want to make a color adjustment. I click the arrow for Correction 1, as shown in 图3(下面). 在校正1的颜色调整面板中,我选择饱和度,然后把饱和度往下拉. 你可以看到 图4 (below 图3), it goes into black and white.

图3. Opening the Color Adjustment panel.
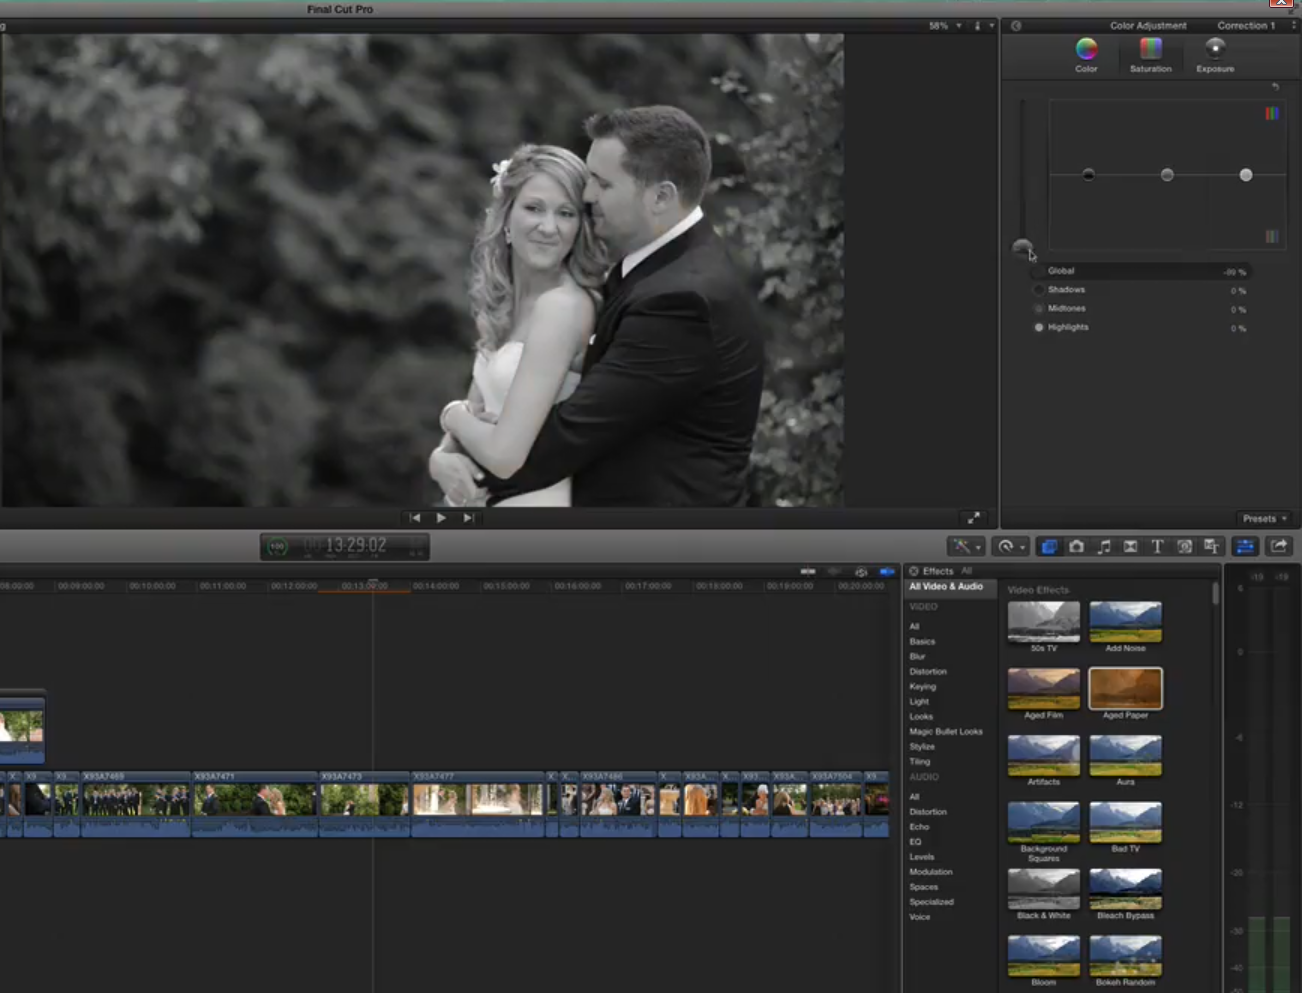
图4. 通过在检查器的颜色部分拖动饱和度滑块,对时间轴光标处的剪辑(没有选择其他剪辑)进行颜色调整.
But if I do the same thing with the clip before it selected, 时间轴光标处的剪辑(并显示在预览窗口中)将不受影响. The adjustment we’re making is applied to the selected clip, which happens to be the one next to the clip currently in the preview window. 这个故事的寓意是,确保你正在制作的剪辑被选中.
确保你正在调整你所看到的剪辑的一种方法是在播放时按键盘上的C键,它会自动选择时间轴光标下方的任何剪辑.
现在让我们假设你想对一个恰好不在时间轴光标下的特定剪辑做一些工作. Click it and highlight it to load it into the Inspector. 如果你进入Inspector并开始修改,你会发现没有任何变化. The reason is because the timeline cursor is elsewhere, and we’re viewing the clip under the timeline cursor, not the on selected for adjustments. So as you drag the sliders in the Color Adjustment panel, you’re making changes to the clip that you selected, 但你看不到它们的预览因为时间轴光标在时间轴上的另一个剪辑上.
快速突出显示剪辑并同时移动时间轴光标的一种方法是按住Option键并单击它, and Final Cut Pro X will move your timeline cursor there as well. That way it’s selected, 它在排队, and it’s loading that clip to the Inspector, 加上你的时间轴光标是排列的,所以你实际上是在实时查看的变化, instead of viewing another part of the timeline.
相关文章
以下是使用cineLook在冷冻铸造X中应用胶片纹理的两个工作流程(带和不带大猩猩纹理), first with 4k footage shot with the Blackmagic Production Camera, and then with Cinestyle-flattened DSLR footage.
In our first tutorial on the recently released FCP 10.1, we look at the new Libraries feature, 它增强了项目和媒体组织,并简化了从FCP 7过渡到编辑的调整.
这个Apple Final Cut Pro X教程详细介绍了检查器中的色彩校正, exploring the Balance Color, 颜色匹配, and Color Mask and Shape Mask features.
在这个视频教程中,格伦·艾略特的Cord3Films着眼于冷冻铸造X的时间轴索引,它提供了创新的观看选项, 导航, and searching your projects, 包括三种不同类型的时间线标记,以及创建一个可导航的编辑笔记列表的能力,这对于协作工作流是必不可少的.
在本教程中, Cord3Films的格伦·埃利奥特演示了如何在Apple Final Cut Pro X的多镜头编辑中混合来自多个摄像机外的音频.
In part 2 of our series on multicam editing in Final Cut Pro X, 格伦·艾略特解释了如何在红巨人的PluralEyes 3中加速和简化多镜头同步过程.
我们的Final Cut Pro X教程系列继续在冷冻铸造X中进行多摄像机编辑的3部分系列的第一部分, 解决基础,如创建多镜头剪辑和切割和切换音频和视频使用角度编辑器.
在冷冻铸造X中使用复合剪辑类似于Final Cut Pro 7中的嵌套序列. Once you understand how it works, and how changes to compound clips can ripple across projects, it's a powerful feature that you'll find yourself using more and more.
在本教程中, 我们将介绍几种方法,您可以使用连接的故事情节来增强您的冷冻铸造X编辑,并以快速有效的方式混合过场剪辑和创意镜头.
本教程探讨了冷冻铸造X中的高级编辑技术,包括反向编辑, replacing edits and auditioning, 全体编辑, 扩展编辑, trim-to-selection edits, 键盘修剪, and the Precision Editor.
磁性时间轴是Apple Final Cut Pro X的主要革命性变化之一, 这是编辑们从基于轨道的NLEs来的时候所遇到的困难之一. 在本教程中,我们将分解它并向您展示如何使其为您工作.
In this first installment of our new tutorial series, 格伦·艾略特 demystifies Final Cut Pro X, illustrates its core functions, and focuses on one of the most powerful new features for organizing, 加速, and streamlining your edits: metadata keyword tagging.